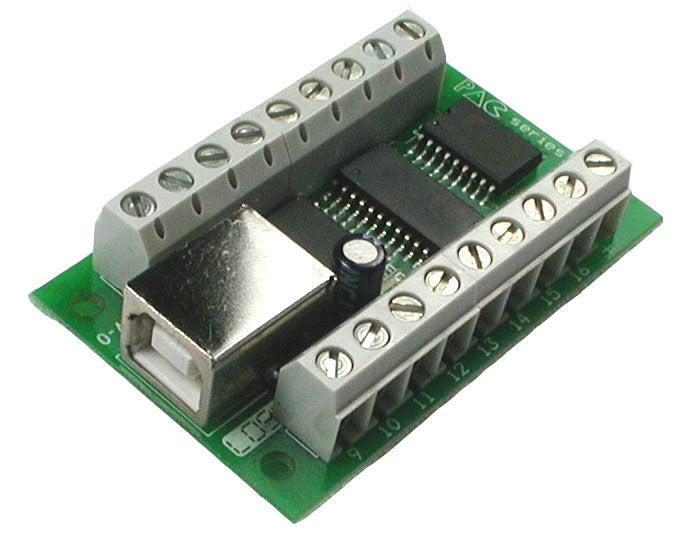
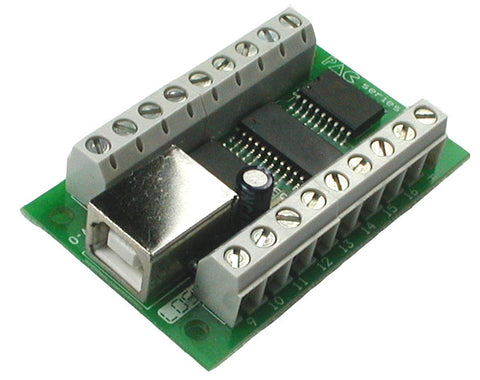
LED Light Control Board
Driver board for devices such as LEDs, solenoids, lamps etc
When used with the MALA front-end, the easiest way to add illuminated buttons to your panel.
- Will drive up to 16 standard LEDs with no additional power.
- Up to 4 boards can be used (more by request). Different IDs available.
- 500mA per channel
- 500mA total current without external power supply. Higher current draw will require additional power.
- 5 volt outputs without external power supply.
- Up to 48 volt outputs with external power supply.
- Open-Source software. No driver required.
- Downloadable example VB application.
- C++ code on request.
- Support as a LED driver for several MAME front-ends soon.
- Linux Support
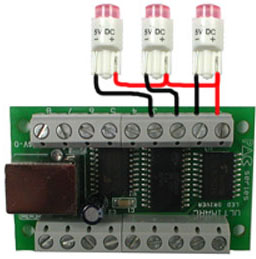
The picture below shows a schematic representation of 3 LEDs connected. These are 5 volt LEDs as used in our UltraLux buttons
In actual usage the connections would be made using quick-disconnects to the button lampholder.
up to 16 can be connected in this way. No external power required.
To simplify connection, for the power "daisy-chain" you can use our pre-made daisy-chain harness.
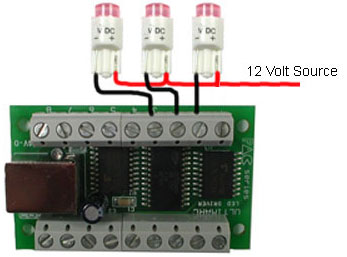
For connecting devices requiring a higher total current than 500mA for all devices, or devices requiring more than 5 volts,
Instead of connecting the red power "daisy chain" to the "+" connection on the PCB, simply connect to an appropriate voltage source.
For example a PC disk power connector will provide 12 volts through the yellow wire.
When powering from a PC, there is no need for a ground wire since the ground return is via the shield of the USB cable.
The diagram below shows how to connect 12 Volt LEDs
IMPORTANT: When connecting solenoids you must connect a diode across each coil to eliminate "back-EMF" discharge through the driver board. The diode is connected with the end marked with a line to the power-supply end of the coil. Diodes are not required when connecting LEDs.
Ultimarc LED and output controllers have great software support, including PC and Linux software and our own SDK which enables easy addition of output control to your own programs.
Also a Linux library is available. See our Programming tab above.
 For Windows
![]() For Linux
For Linux
Open the LEDBlinky Configuration and select the LEDBlinky Tools tab. Select the Generate Input Map button.

Enter your control and input port maps to your Pac-Drive using the controls as below.

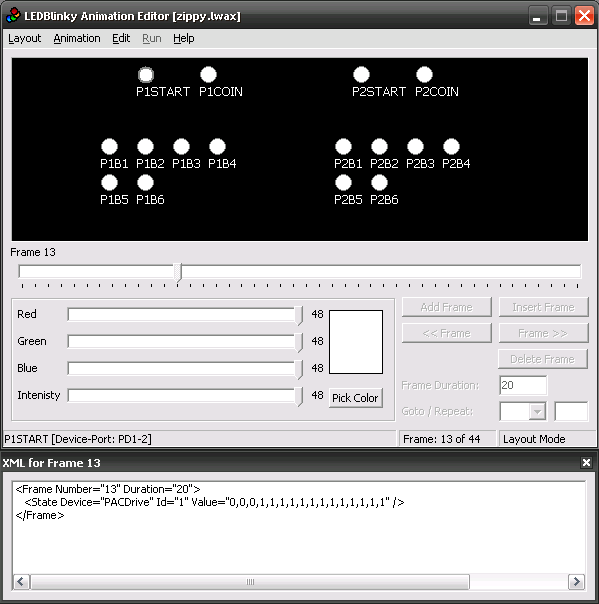
The LEDBlinky Animation Editor is a program that allows you to create complex LED animations with your Pac-Drive controller board. The program includes a layout editor for designing your arcade control panel and a timeline for creating LED Animation files (called LWAX format).
MALA is a front-end menu system for MAME and other emulators. This front-end supports the Pac-Drive board without the need for any plugin.To see how easy it is to add illuminated-button LEDs using this front-end and the Pac-Drive, see below:
First, right-click on the MALA screen and select "options"
Then, in the menu, select "Hardware".
You should see the window below:

In this window, the detected Pac-Drive board should be shown. Click on "set" to use this board.
Then click the LED tab and the window below should be displayed:
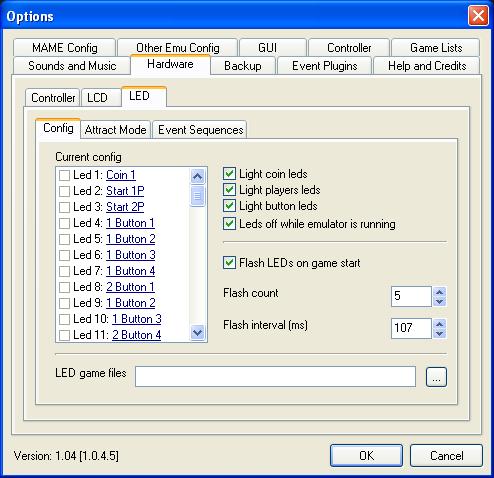
In this window, in the left-hand area, you can click in the tick-boxes to test each LED. (the tick-boxes are for testing only and don't affect the saved configuration). Then, for each LED, click on the description text (which will be "not used" if you have not yet configured). Assign each LED to a button in the resulting drop-down selection.
In the right-hand area, the tick-boxes enable the LEDs to be illuminated for controls which are used in each game. If you enable these, you will see the LEDs change as you scroll through the game list in the main MALA game menu.
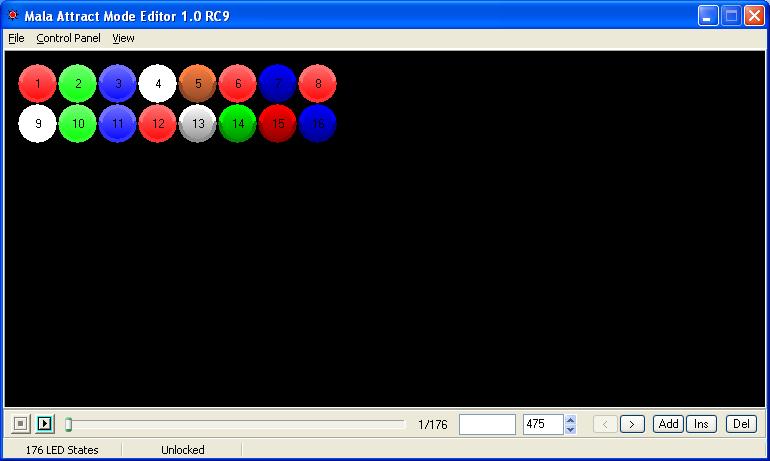
In addition, you can set up an "attract-mode (idle mode) LED flash display. Click on the Attract Mode tab and you will see the window below:

Here, you can choose to have a random LED flash pattern during idle mode. Or you can use a pre-defined flash pattern. You can define and save patterns for use here, using the MALA Attract Mode Editor which is a separate program. The screen is shown below:
GameEx is a front-end for MAME and other emulators. You can download it from http://www.gameex.net/.
GameEx supports the Pac-Drive using a plugin that is available in the official GameEx download. To setup your PC to use the plugin follow these instructions.
First select Start > Programs > GameEx > Plugin Manager.
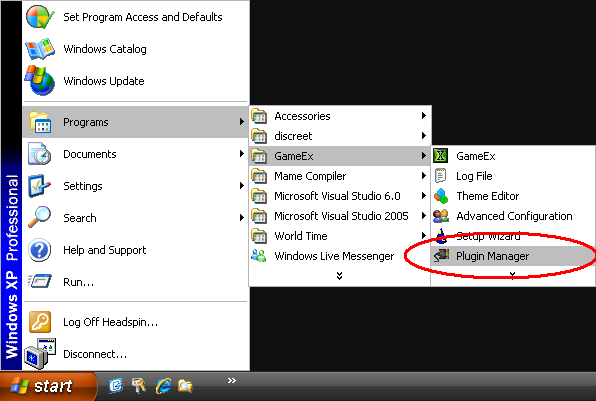
The Plugin Manager will now open on screen.
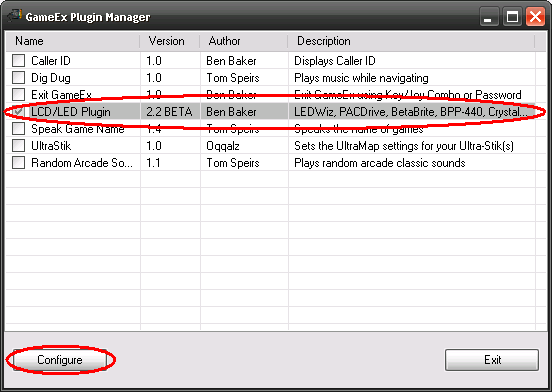
Select the LCD/LED Plugin from the list and put a tick next to it to enable the plugin. Then select Configure.
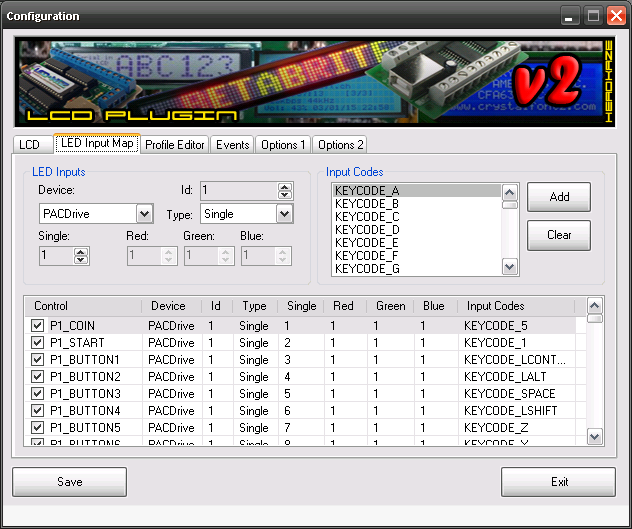
Go to the LED Input Map page and assign the inputs associated with your PacDrive including the Input Codes for use in MAME. You should see the LED's light in realtime as you configure your ports.
That is all you need to configure the plugin for use with the Pac-Drive in GameEx. This plugin also support's Arzoo's LED Animation Editor which is used to create LWAX files which are animation files for the Pac-Drive.
~If for any reason you are not happy with the part you can get a full refund within 30 days~